Get Started
Install the plugin, enter your licence key, and connect Stripe in under 10 minutes.
Stripe Setup
Connect your Stripe account, configure webhooks, and go live.
Campaigns
Create campaigns, set targets, add images, and embed with a shortcode.
Shortcodes
All shortcodes explained — donation form, meter, leaderboard, and comments.
1. Installation
- Download the donate-positive.zip file from your account dashboard.
- In WordPress admin, go to Plugins → Add New → Upload Plugin.
- Upload the zip file and click Install Now.
- Click Activate Plugin.
- You’ll see a new Donate Positive menu item in your WordPress admin sidebar.
2. Connect Stripe
- Go to Donate Positive → Settings → Stripe.
- Enter your Stripe Publishable Key and Secret Key. Find these in your Stripe Dashboard → Developers → API Keys.
- Set mode to Test while setting up, then switch to Live when ready.
- Add the webhook URL shown in settings to your Stripe dashboard under Developers → Webhooks. Copy the webhook signing secret back into the settings.
3. Create Your First Campaign
- Go to Donate Positive → Campaigns → + New Campaign.
- Add a title, description, and feature image.
- Set a fundraising target (optional) and currency.
- Configure predefined donation amounts (you can add labels like “£10 = 1 Food Pack”).
- Choose button and meter colours to match your brand.
- Click Create Campaign. You’ll be taken to the Campaigns list where you’ll see your campaign’s shortcode.
4. Add to a Page
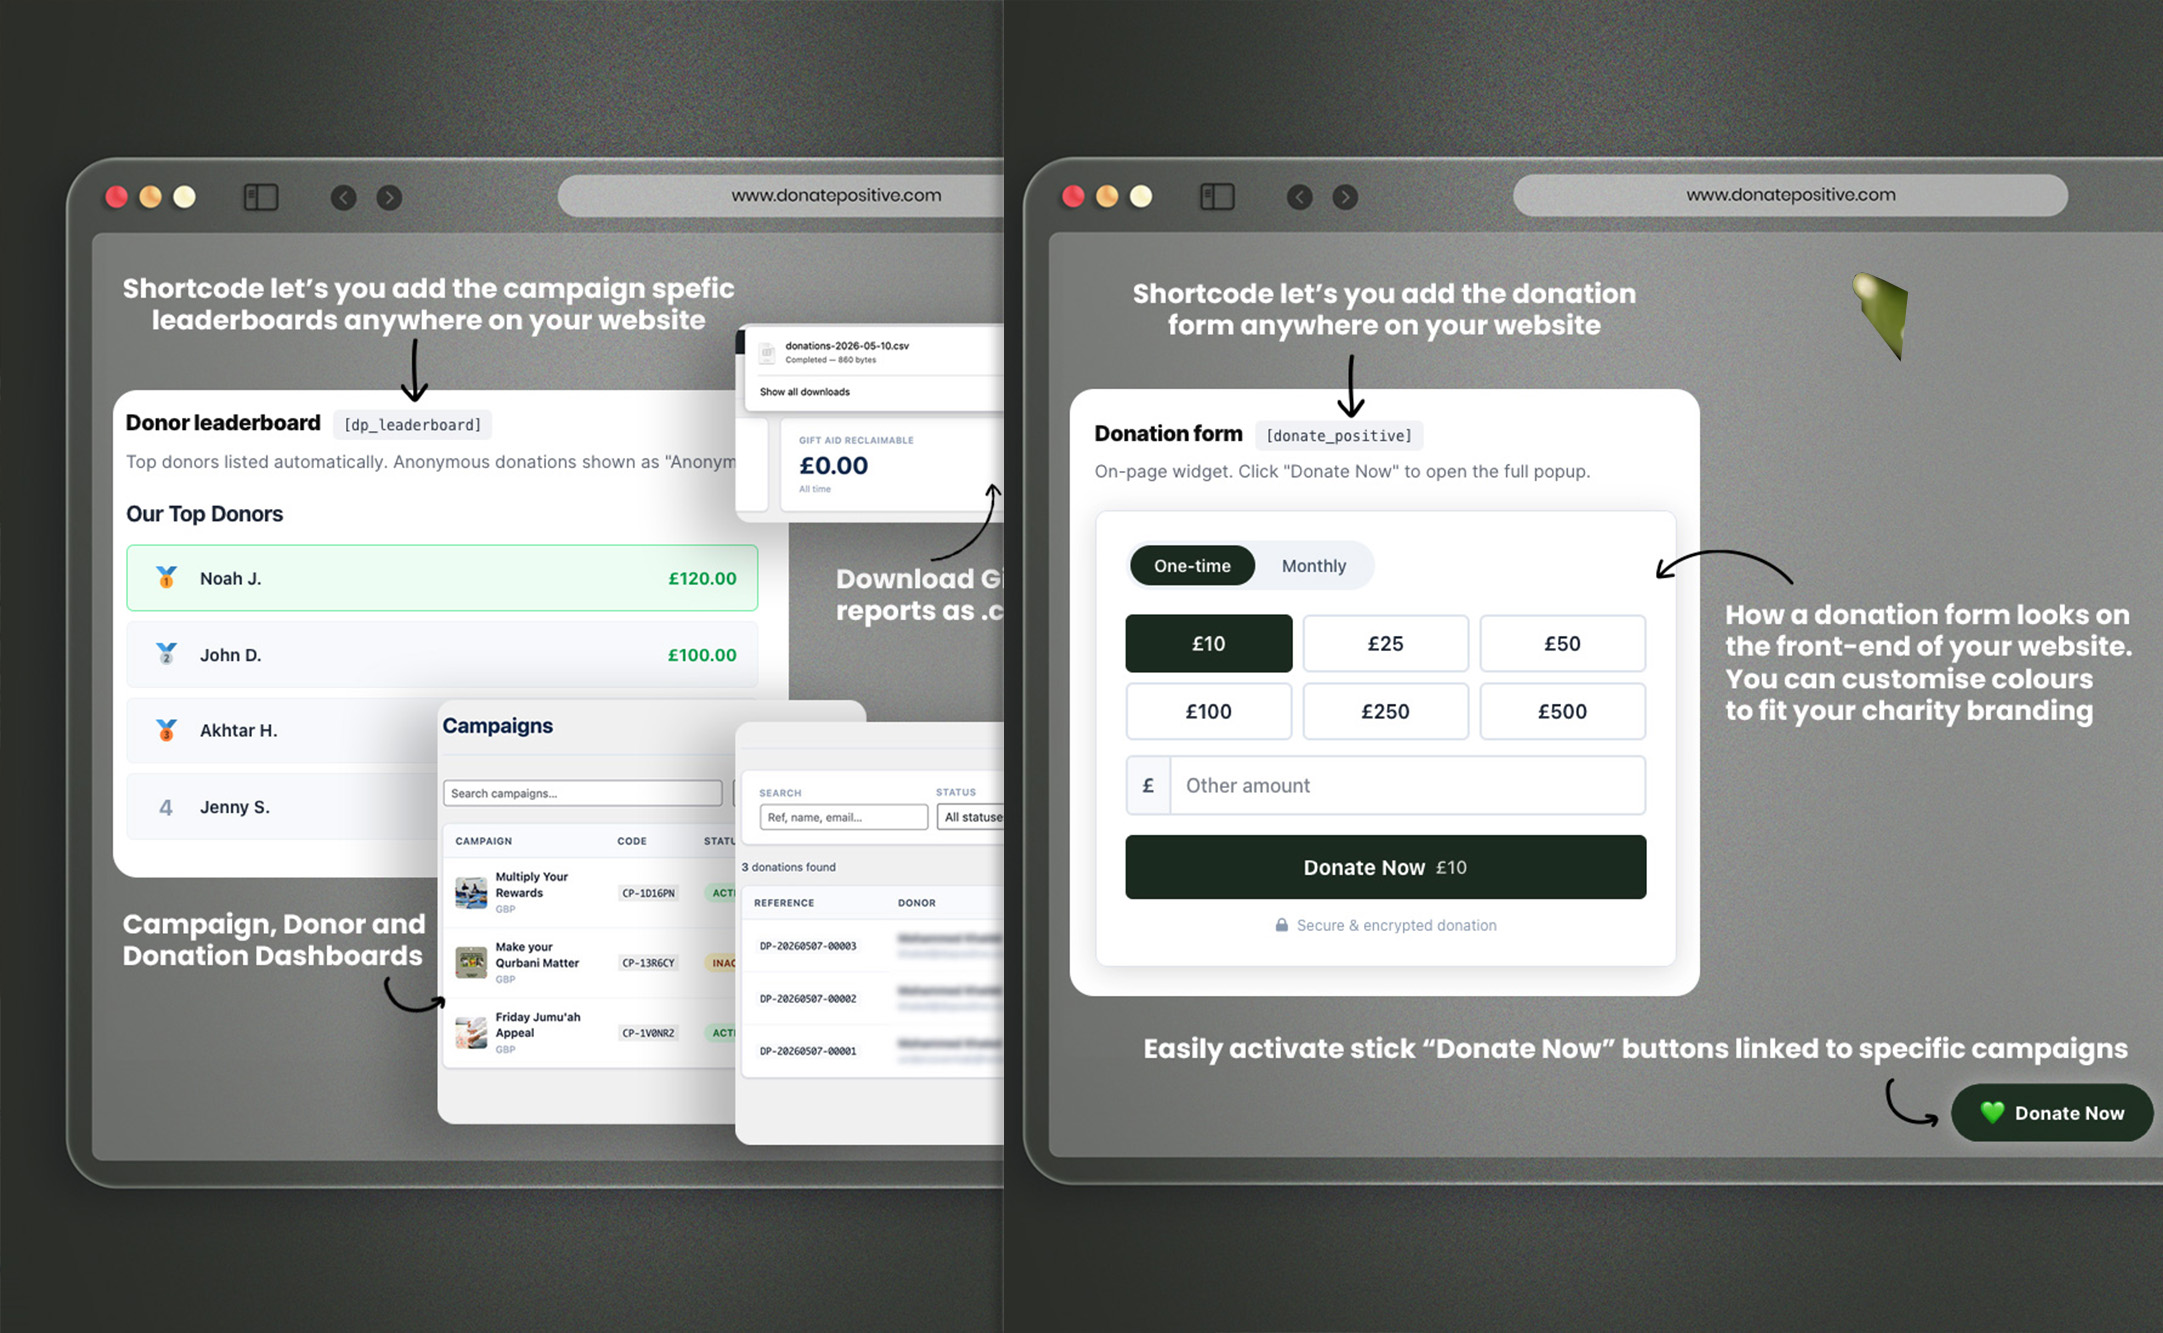
- Each campaign generates four shortcodes:
- [ donate_positive campaign=”CP-XXXXXX” ] — The full donation form widget + modal
- [ dp_meter campaign=”CP-XXXXXX” ] — Animated fundraising progress meter
- [ dp_leaderboard campaign=”CP-XXXXXX” ] — Top donor leaderboard
- [ dp_comments campaign=”CP-XXXXXX” ] — Dedication messages
Paste any of these shortcodes into a WordPress page, post, or Elementor/Divi text block. The donation form will appear automatically.
5. Enable Gift Aid
- Go to Donate Positive → Settings → General.
- Make sure the currency is set to GBP.
- Check “Enable Gift Aid prompt on donation form”.
- Gift Aid only applies to GBP campaigns where the donor is a UK taxpayer. The plugin handles the declaration, address capture, and HMRC-compatible export automatically.
To export Gift Aid declarations: go to Donate Positive → Reports → Export Gift Aid CSV.
Frequently asked questions
Send us a message, and we’ll get back to you within 1 business day.
- Response within 1 business day
- Priority support for annual plan customers
- or email us → info@donatepositive.com